The TCL Roku TV interface is a bit different from other televisions you might use. Most people are used to an “Input” button on their remote for switching inputs. With the TCL Roku TV, things are a bit different.
In This Guide
Switching Inputs from Home Screen
Note: Inputs must be setup first before they show as an option. If you haven’t setup any inputs yet, see the section of this post titled “Setting Up Inputs”.
Use these steps to switch inputs:
- Press the Home button on the remote to get to the Home screen.
- Use the control pad to navigate up and down the list of apps and options.
- Select the tile for the input you wish to use.

Switching Inputs Without Remote
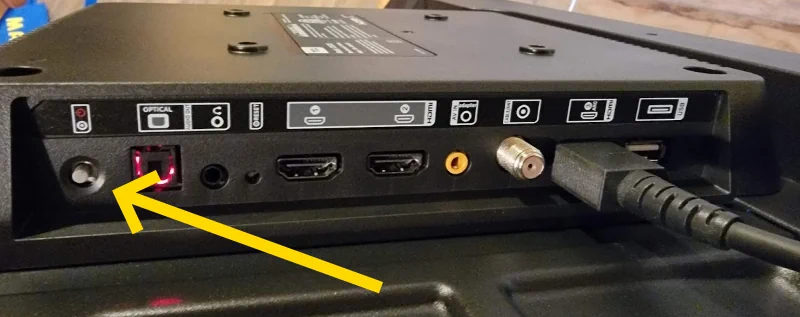
Most Roku TV models have a tiny joystick type of button located on the back of the TV next to the ports. Sometimes this button is located on the edge of the TV under the logo.
Press in on the stick then release it to bring up a menu on the screen. Flick the stick up and down to choose the HDMI port you wish to use. Once the selection is highlighted, press in on the stick then release it to make the selection.
Setting Up Inputs
- From the Home screen, press the left arrow to show the menu, then select “Settings” on the left pane.
- Choose “TV Inputs“, then press “OK“.
- A menu will appear to the right where you can choose the desired input (HDMI 1, HDMI 2, Live TV, etc.)
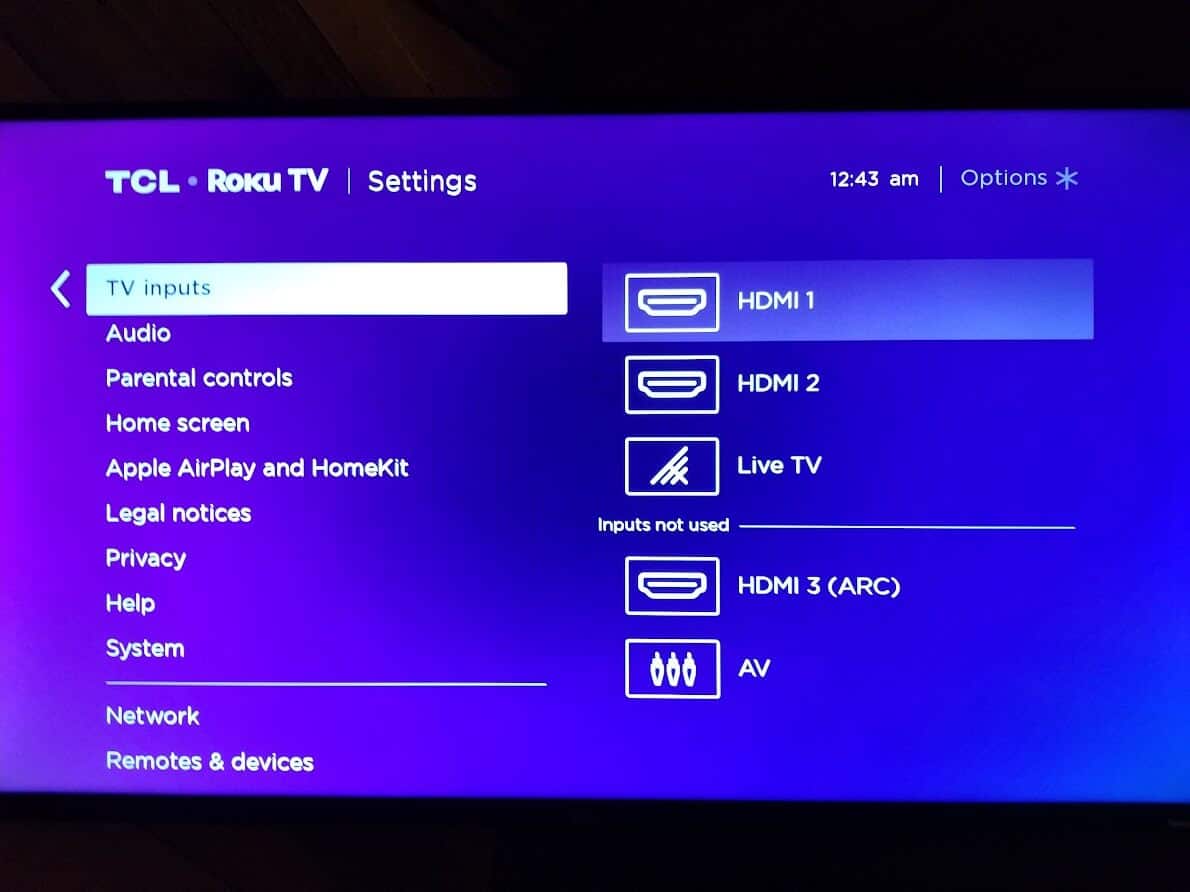
- Select “Rename” to give the port a name. You can choose names related to the attached device like “Wii” or “XBox”
Setting a Default Input
The option to set the input used when you turn the TCL Roku TV on is in a different set of settings.
- From the Home screen, press the left arrow to show the menu, then select “Settings” on the left pane.
- Navigate down to highlight “System” then press “OK“.
- Highlight “Power“, then press “OK“.
- Navigate down to highlight “Power On“, then press “OK“.
- Choose the option desired for the input to be used when the TV is powered on.
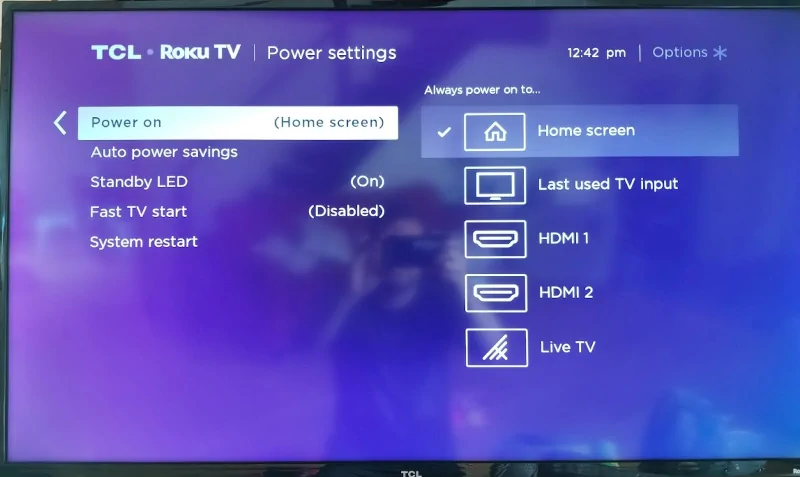
Note: I have been made aware that some models only have an option for “Home” or “Last used TV input”. I don’t believe there is a way to upgrade your TV to have the other options.
I hope you have all of the information you need about changing the inputs on the TCL Roku TV. If you have any questions, drop us a comment below.
What happens if I can’t find an input on my Roku tv, I’ve been looking and reading but no solutions. We wanna play the wii, but can’t because we have no HDMI 3.
Seems like you’ll need to unplug something from one of the other HDMI ports.
Press the house button on the remote
Press the up arrow one time and highlight Settings: Press OK
Locate TV inputs: Press OK
Here you will see the list of inputs (See the image above for Setting Up Inputs)
find the input in question (It may not split up the inputs like this image does)
Press OK and it should come up with show or id. you need to add it to be seen for it come up
i have selected hdmi, but now have choices
dvd
sat
game
digital stb
pvr
hd
cable
other
which do I chose