
The Amazon Fire TV will automatically obtain an IP Address and DNS server from the router it’s connected to if DHCP is enabled on the router. Sometimes a static network is used instead. If you wish to manually assign a static IP Address and DNS server address to your Fire TV, just follow these steps.
Note: Before starting, you may want to go under “Settings” > “My Fire TV” > “About” > “Network” and write down the network settings there. If you don’t have your network info memorized, you’ll need this information later.
Setting Static IP & DNS on Fire TV
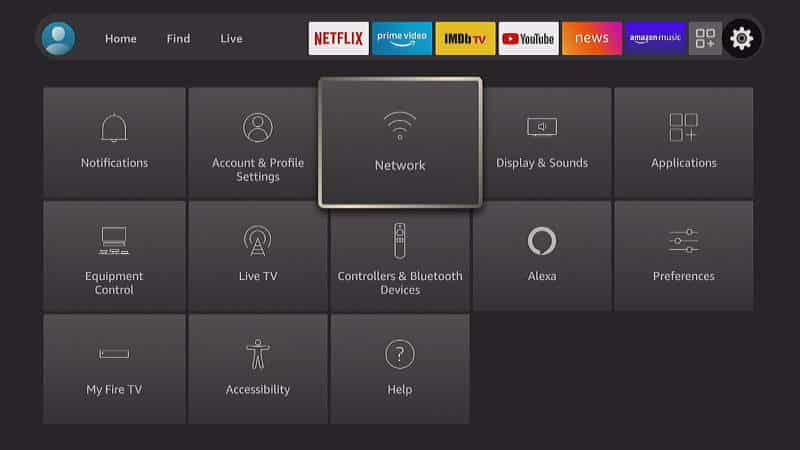
- Starting at the Home screen, select “Settings” ⚙️.
- Open “Network“.
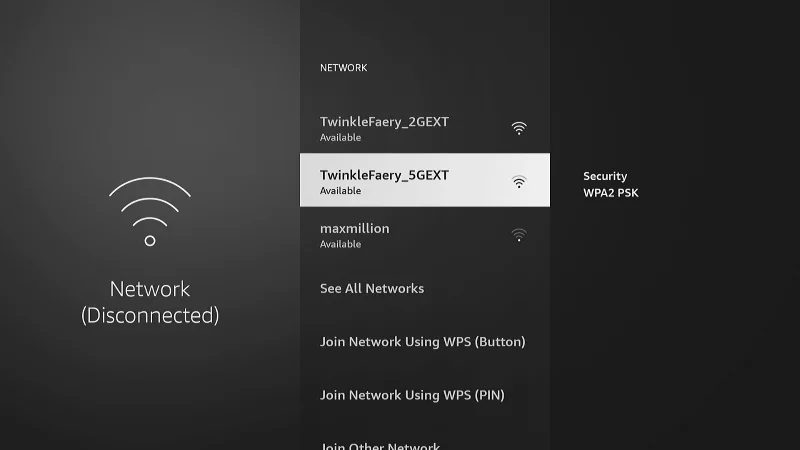
- If you are connected to the network connection you wish to configure, highlight the network, then press “Menu” ☰, then “Select” ● to disconnect from it.
- Select the network name you want to use.
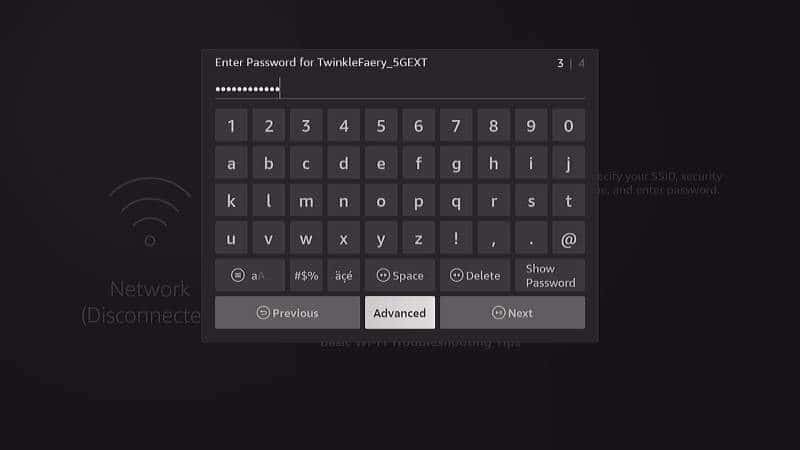
- Type the password to the network. Don’t select “Next”. Instead, select “Advanced“.
- Manually type the static IP Address you wish to use, then select “Next“.

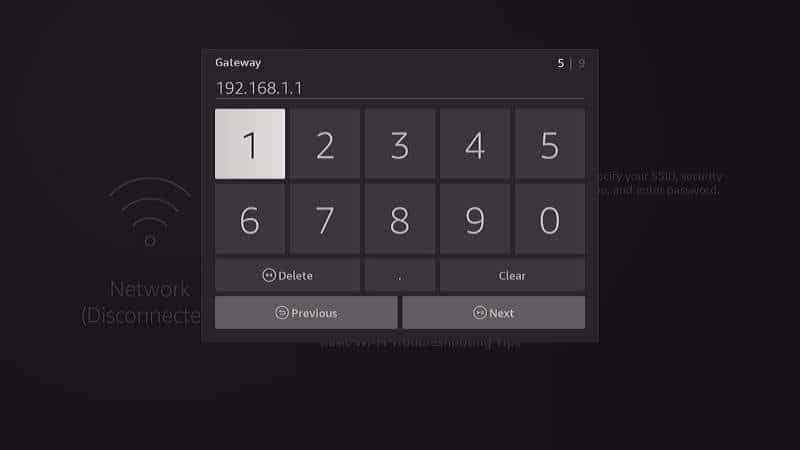
- Type the address for the Gateway for the network, then select “Next“.
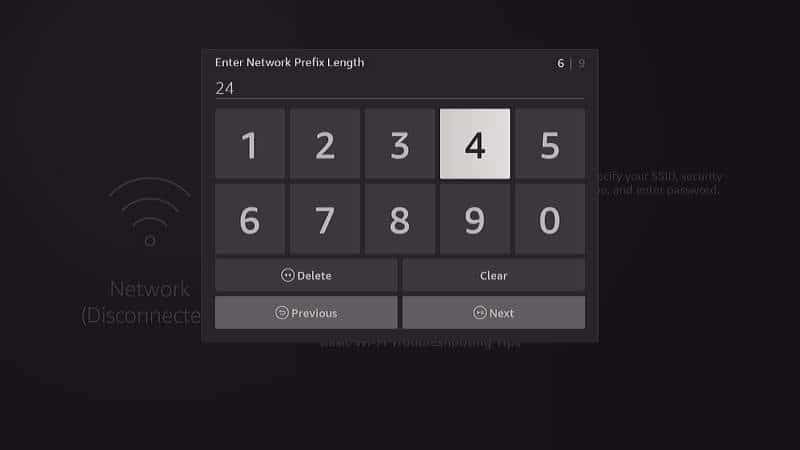
- Type the Network Prefix Length, then select “Next“. This value is for your Subnet Mask. It’s likely going to be 24. Use an IP Subnet calculator if you need to find the value for this.
- Type the address for the first DNS server, then select “Next“.

- Type the address for the second DNS server, then select “Next“.

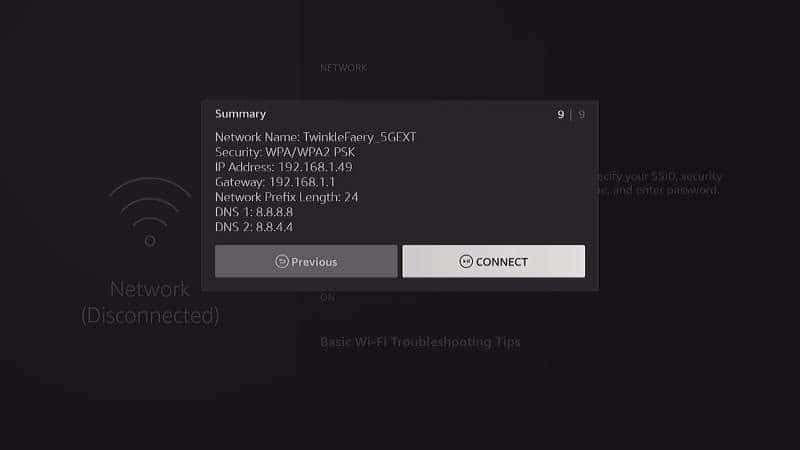
- Review the information. If it looks good, select “Connect“. If not, select “Previous” to get to the screen to make the correction.
That’s all there is to it. Hopefully, your Amazon Fire TV has successfully connected to the network and is not using a statically set IP Address and DNS server. If the connection is not successful, you may have to try these steps again to ensure all settings are correct.